How to Draw Hair
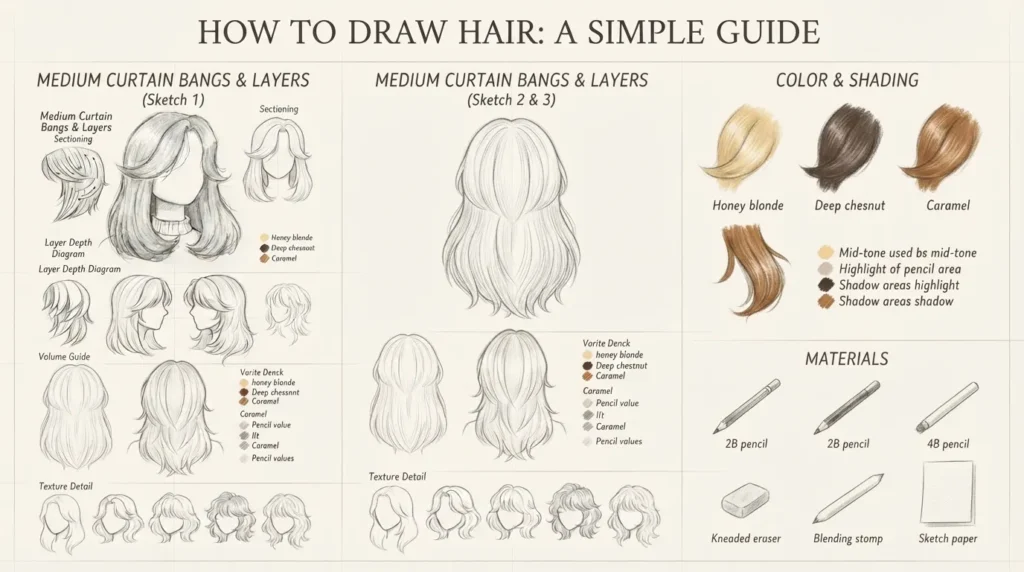
Learning how to draw hair becomes much easier when you stop thinking about hundreds of individual strands. Hair is a three-dimensional form made from larger shapes, sections, locks, clumps, and smaller strands.
Whether you are drawing realistic hair, anime hair, or hair for character design, the basic idea is the same: understand the head, establish the hairline, organize the hair sections, create the overall shape, and then add values, shading, and texture.
The goal is not to draw every hair. The goal is to make the hair look natural, dimensional, and connected to the head.
Start With the Head and Hairline
Before drawing detailed hair, understand the shape underneath it.
The head can be treated as a spherical form rather than a flat surface. Hair wraps around this form, and the direction of the hair changes according to its position on the head.
Start by identifying:
- The hairline
- The hair parting
- The main hair sections
- The direction of each section
- The outer hair silhouette
- The amount of space between the head and hair
This foundation is important because hair does not simply glue itself to the head. There can be space between the head and hair edge, as well as space between different hair layers.
A Simple Construction Method
Use these 3 construction areas as a starting point:
| Construction area | What to look for |
|---|---|
| Gap between head and hair edge | The space that creates visible hair volume |
| Layers at the back of the head | How different sections overlap |
| Hair volume on each side | How much the hair extends away from the head |
Longer hair is also affected by gravity, so it should not always follow the exact curve of the spherical head.
Simplify Hair Into Larger Shapes
One of the easiest ways to make hair drawing manageable is to simplify it before adding detail.
Instead of focusing on individual strands, look for:
- Major hair shapes
- Large value changes
- High-contrast areas
- Changes in hair direction
- Large sections and locks
- Areas of light and shadow
Hair can be viewed as clumps, locks, or bundles of strands. These larger groups make it easier to understand the overall silhouette.
Once the main shapes are correct, smaller details become much easier to place.
Find the Flow of the Hair
Hair gestures help create movement.
Imagine invisible curved lines traveling through the hair. These lines connect different hair elements and guide the viewer’s eye from one section to another.
For flowing hair, try using curved gesture lines instead of drawing stiff individual strands.
A good gesture should communicate:
- Where the hair begins.
- Which direction it travels.
- Where the section ends.
This approach works particularly well for long hair, wavy hair, and dynamic character art.
Build Hair Sections and Locks
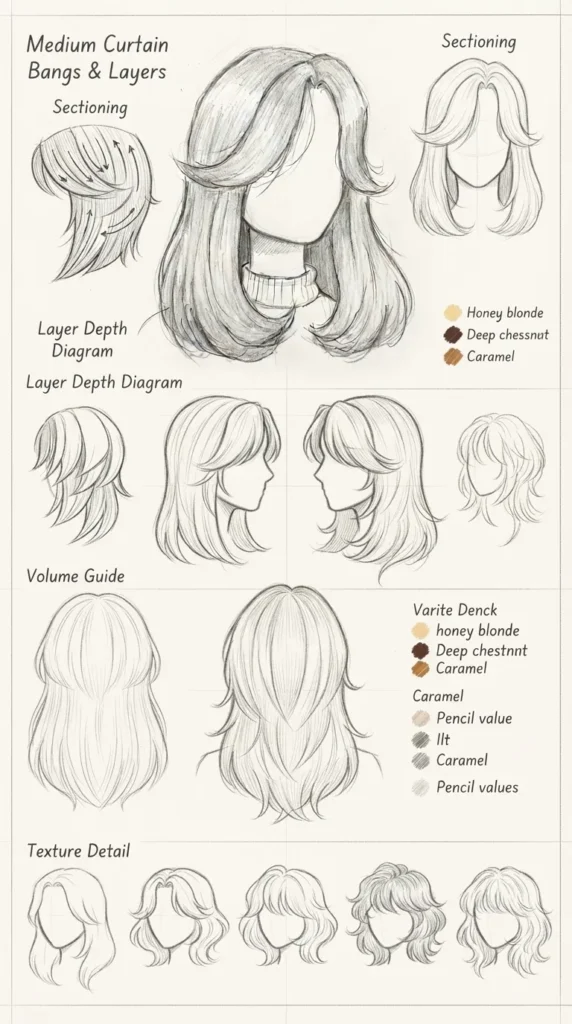
Hair becomes easier to understand when it is divided into sections.
Start from the hair parting or another clear reference point and follow the route taken by each section.
Think about where each lock originates and where it travels.
A useful sequence is:
- Find the origin of a hair section.
- Follow its direction.
- Draw its outer shape.
- Connect it with neighboring sections.
- Add smaller strands later.
This keeps the drawing organized instead of making the hair look like a collection of unrelated lines.
Use Simple Forms to Understand Hair
Hair can be understood through simple three-dimensional forms.
Three useful form comparisons are:
| Form | How it helps |
|---|---|
| Cylinders | Useful for curls and rounded sections |
| Planes | Helpful for understanding changing light across hair |
| Ribbons | Useful for organizing flowing sections and locks |
A curl, for example, can be treated as a cylindrical form. A flowing lock can be simplified into a ribbon that becomes thinner toward the tip.
Thinking in forms makes it easier to decide where highlights, half-tones, and shadows should appear.
How to Draw Wavy Hair
Wavy hair depends strongly on flow and movement.
A simple 3-stage method is:
- Draw the outline of the main lock using an S shape.
- Fill the shape to establish the silhouette.
- Add smaller strands that follow the main direction while introducing slight variation.
Do not make every wave identical. Small changes in direction can make the hair feel more natural.
Wavy hair can communicate movement, energy, and curved forms without requiring hundreds of lines.
How to Draw Curly Hair
Curly hair can look complicated, but it can be simplified into a few basic stages.
Use this 4-step approach:
- Create the basic shape.
- Create the spiral or curl.
- Define the outline.
- Add details and texture.
Start by treating the curl as a cylinder or ribbon. Make the ribbon thinner toward the tip, then introduce internal and external details.
The larger curl should remain understandable even after texture is added.
How to Draw Straight Hair
Straight hair usually benefits from clean, controlled shapes.
Begin with the main direction of the hair and establish the large silhouette before adding individual strands.
Straight hair can feel calm, simple, and elegant when:
- The sections have clear direction.
- The silhouette is controlled.
- The values are organized.
- Strands are added selectively.
Avoid filling the entire shape with random straight lines. The large form should remain the main focus.
How to Draw Short Hair
Short or almost shaved hair requires a different approach from long hair.
Instead of emphasizing long flowing locks, focus on the overall surface and direction of the hair.
Short hair can appear:
- Prickly
- Pointy
- Rough
- Closely connected to the head
The head shape and hairline become especially important because there is less length to hide construction mistakes.
Use Values to Create a 3D Effect
Values help turn a flat hair drawing into a three-dimensional form.
Start by looking for the lightest and darkest areas of the reference. Squinting can help simplify the image and make the main value groups easier to see.
Then gradually introduce more subtle values.
A simple value process has 3 stages:
| Stage | Action |
|---|---|
| 1 | Define the edges |
| 2 | Add mid-tones while maintaining stroke direction |
| 3 | Add darker shades to overlapping areas |
Leave illuminated areas lighter while building darker values where hair overlaps.
The important point is to establish the large light and dark relationships before spending time on small details.
Understand Highlights, Half-Tones, and Shadows
Three important elements help describe the form of hair:
- Highlights
- Half-tones
- Shadows
Highlights show areas receiving stronger light. Shadows describe areas turned away from the light. Half-tones connect the two and help create gradual transitions.
When rendering hair, establish the main highlight and shadow shapes first. Then use the space between those two extremes to find the half-tones.
This makes the hair feel like a form instead of a flat collection of marks.
Match the Hair to the Lighting
For convincing realistic hair, remember 3 requirements:
- Hair should describe the form of the head.
- Hair should follow the same lighting pattern as the face.
- Hair should represent light and shadow across its form.
This is why copying random highlight patterns can make hair look unnatural. The lighting needs to make sense with the head and the surrounding face.
Add Texture After the Structure
Texture should come after construction and form.
If the large shape is incorrect, adding more strands will not fix it.
First establish:
- Head form
- Hairline
- Sections
- Locks
- Silhouette
- Light
- Shadow
- Half-tones
Only then add individual strands and texture.
This approach also saves time because a few carefully placed strands can communicate much more than hundreds of random lines.
Make Hair Look Like the Reference
When drawing from a reference, focus on the features that create likeness.
Squint at the reference to simplify it. Look for the lightest and darkest areas first, then identify the major shapes.
Specific shapes often matter more than tiny details.
Ask yourself:
- Where is the largest dark shape?
- Where is the strongest highlight?
- Which section changes direction?
- Where does the hair overlap?
- Which part of the silhouette makes the hairstyle recognizable?
This keeps the drawing focused on what matters most.
Create a Natural Hair Contour
The outside contour strongly affects the final appearance.
Avoid drawing the entire outer edge with one continuous hard line. Real hair usually has a mixture of softer and sharper edges.
Try combining:
- Soft edges
- Sharp edges
- Small value changes
- Slight irregularities
- A few flyaway hairs
Flyaway hairs can make the hairstyle feel more natural, but they should support the main shape rather than cover it.
Add Individual Strands Carefully
Individual strands are finishing details, not the foundation.
Once the overall form works, add a limited number of strands to:
- Clarify direction
- Break up overly smooth areas
- Strengthen the silhouette
- Show texture
- Add natural variation
Avoid placing the same number of strands everywhere. Some areas should remain simple while other areas receive more detail.
This creates visual hierarchy and keeps the viewer’s eye moving through the hair.
Hair Texture and Hair Type
Different hair types require different visual decisions.
| Hair type | Main visual feeling | Useful focus |
|---|---|---|
| Short hair | Prickly and rough | Direction and surface |
| Wavy hair | Curved and energetic | S-shaped movement |
| Straight hair | Calm and elegant | Clean sections and direction |
| Curly hair | Voluminous and soft | Cylindrical curls and texture |
Texture can increase complexity without requiring every strand to be individually drawn.
The most important rule is to keep the underlying form visible.
A Complete Hair Drawing Workflow
For beginners and experienced artists alike, this sequence provides a simple way to approach almost any hairstyle.
Step 1: Establish the Head
Think of the head as a spherical form and understand the direction of the surface.
Step 2: Find the Hairline
Place the hairline before building the larger hairstyle.
Step 3: Divide the Hair
Separate the hair into major sections based on the parting and direction.
Step 4: Establish Volume
Show the space between the head and the hair and account for overlapping layers.
Step 5: Draw the Main Silhouette
Create the large outer shape before adding small strands.
Step 6: Follow the Hair Gestures
Use curved lines to understand how each section flows.
Step 7: Add Major Light and Dark Shapes
Start with the strongest values and gradually introduce half-tones.
Step 8: Build the Form
Use cylinders, planes, or ribbons to understand the three-dimensional structure.
Step 9: Add Texture
Introduce smaller locks, strands, and surface details only after the structure works.
Step 10: Refine the Contour
Mix soft and sharp edges, adjust values, and add a few flyaway hairs.
Traditional and Digital Hair Drawing
The same construction principles can work across traditional art and digital art.
For traditional drawing, tools such as a pencil, charcoal, and kneaded eraser can help build and refine values.
For digital art, brushes can be used to create broad shapes, shading, highlights, and texture.
The tool is less important than the process. A good hair drawing still needs clear construction, volume, lighting, and direction.
Common Mistakes to Avoid
Drawing Every Strand
Trying to draw every individual hair can make the process slow and confusing. Start with larger sections instead.
Ignoring the Head Form
Hair needs to wrap around the head. If the head form is ignored, the hairstyle can look pasted onto the face.
Adding Texture Too Early
Texture cannot replace correct construction. Build the form first.
Using the Same Detail Everywhere
Some areas need more detail than others. Keep quieter areas simple so important sections stand out.
Making the Contour Too Hard
A single dark outline around all the hair can make it look flat. Use a mixture of edges and value transitions.
Ignoring Lighting
Highlights and shadows should follow the lighting pattern of the face and the form of the head.
A Quick Practice Exercise
Choose a hairstyle reference and divide the practice into 3 passes.
Pass 1: Draw only the head, hairline, main sections, and silhouette.
Pass 2: Add the large light, dark, and half-tone areas.
Pass 3: Add selected strands, texture, highlights, and flyaway hairs.
This exercise helps you learn to see hair as a three-dimensional form rather than a mass of individual lines.
Hair Drawing Checklist
Before considering the drawing finished, check:
- Is the hairline clear?
- Does the hair follow the shape of the head?
- Are the major sections easy to understand?
- Does each section have a clear direction?
- Is there enough volume?
- Are the light and dark areas organized?
- Do highlights follow the lighting?
- Are half-tones connecting the values?
- Are individual strands used selectively?
- Does the contour contain natural variation?
- Are flyaway hairs used sparingly?
- Does the texture support the overall form?
Final Thoughts
Good hair drawing starts with observation and structure rather than detail. Begin with the head form, hairline, major sections, gestures, and silhouette. Then develop volume through values, highlights, half-tones, and shadows.
Remember the 3 key ideas: understand the form, follow the lighting, and add texture after the structure works.
Whether you are practicing realistic hair, anime hair, wavy hair, curly hair, straight hair, or short hair, the same foundation can make the process simpler. Once the large shapes and flow are convincing, a small number of carefully placed strands can provide the final realistic effect.